

In the Garden: How to Make a Moss Garden Bowl
I’m a total sucker for beautiful tablescapes, and in particular, the centerpieces that anchor the whole design. Each of the tabletops in my home has a centerpiece that I change out quite frequently; in the middle of my kitchen island, the entryway console table and the dining room table always have something fun and different going on!
The outside of my home is no different… the newest addition to our patio this year is a large dining table that I had been looking for for months. My husband put it together yesterday and I couldn’t wait to start on the centerpiece. I have wanted to make one of these moss bowl centerpieces for quite some time, and with all the rain that we’ve been getting lately, this was the perfect project to take on!
I have filmed a whole tutorial on this in my Instagram stories, so make sure to check it out! @styleproductions
To begin, I had to find the right piece for the design I wanted to create. An oversized bowl that wasn’t too heavy, but didn’t look like a cheap plastic material. I searched high and low for the perfect bowl, and finally found one at my favorite stomping grounds, Home Sense for $30! When finding your own piece, look for something that isn’t too deep and also something that either already has a drainage hole or something that’s made out of a material which you can drill holes through.
After drilling a hole in the bowl I found, I started by filling the bowl with pieces of styrofoam that came with a package we had, and I just broke up all the bigger pieces. The styrofoam is important because it fills up the real estate at the bottom of the bowl or pot you’re using, but keeps the whole thing very light, while providing the necessary drainage for your garden. If you have styrofoam packaging peanuts, those will be great too. Fill the bowl with the styrofoam almost to the very top… leave about two inches, that’s where all the dirt will go.

I think the best kind of dirt for moss is dirt that’s actually out in nature, not the gardening stuff you buy at the stores. I just went out to my backyard and filled a giant bucket with soil and used that. Spread the dirt all over the top of the styrofoam, there should be at least two inches of it. Decide what kind of look you want your garden to have; a flat-like plain, or more of a hilly look… and shape the dirt in this manner. Don’t forget to spray the dirt so that it’s relatively moist before you start with the next part.


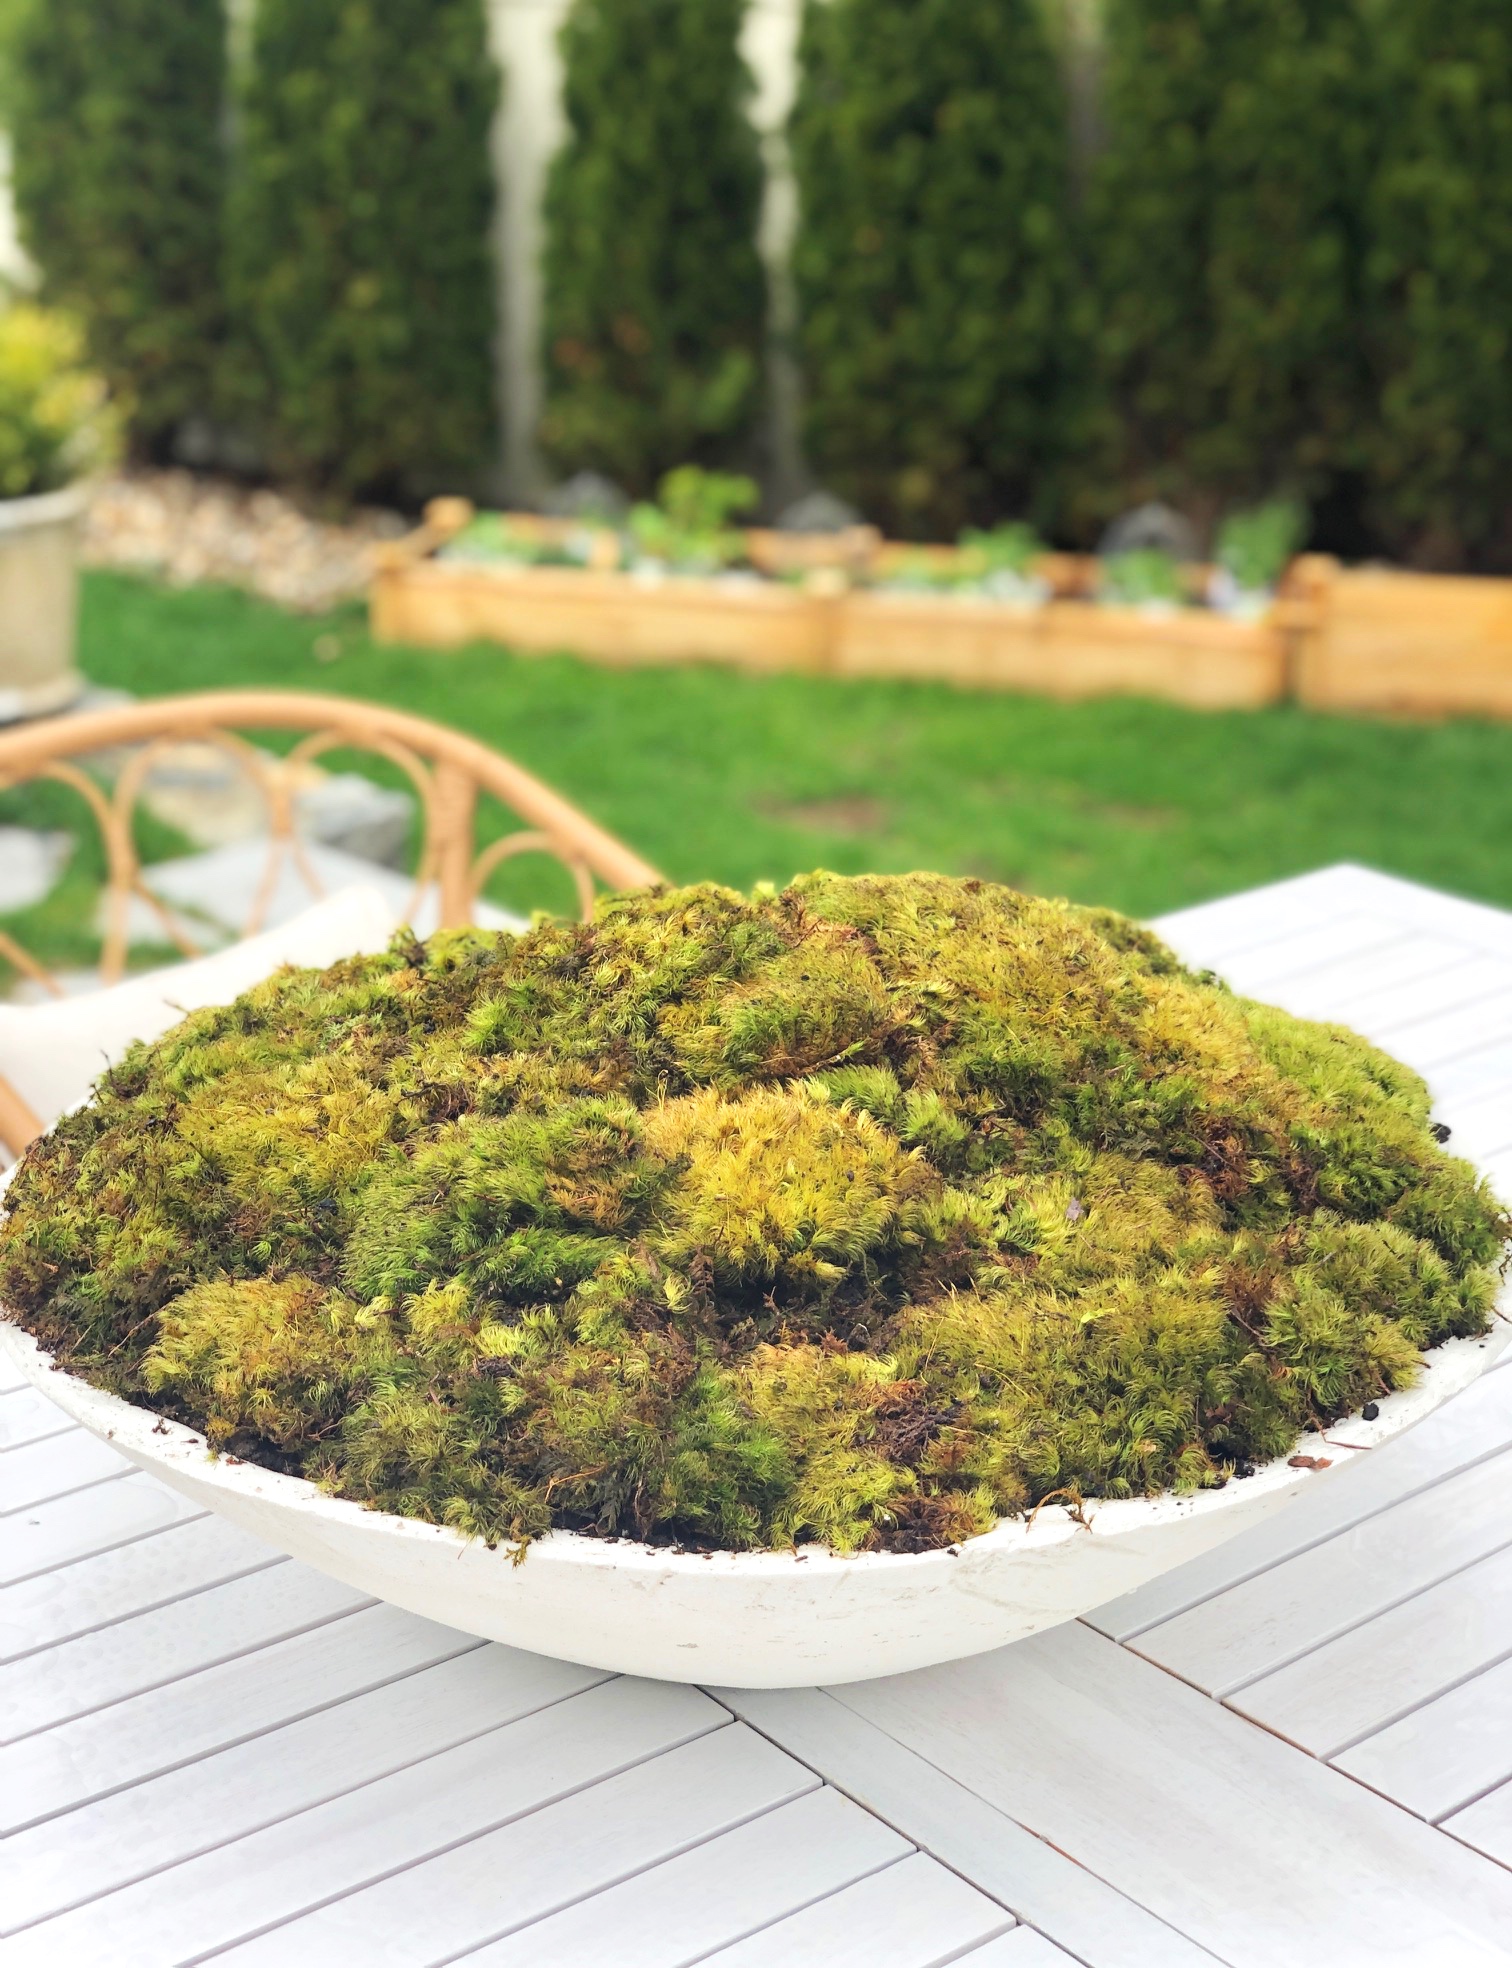
Now comes the fun part! Time to plant your moss… I found my moss in the wooded areas around my home. Take a plastic bag with you and go moss hunting! Moss is unique in that it doesn’t have an intricate nor deep root system like more other plants. Find big chunks of moss and carefully pick them up, trying not to break up its mass. The bigger the pieces you find, the easier it will be to piece them together in your garden.

Start piecing your moss together like a giant puzzle. If you found different types of moss, with varied textures, think about the composition of your garden. Perhaps bunch one type of moss on one side of the bowl, and then the other kind on the opposite side of the bowl… it will look a little bit more uniform… like in its natural habitat. Make sure that each piece has direct contact with the dirt, otherwise there will be an air pocket between the dirt and the moss, and the moss won’t receive the proper amount of moisture and dry out.


And voila! Your moss centerpiece is complete! Make sure to push down on each piece ever so gently to ensure that it’s making contact with the dirt, and then give it a good spray with your spray bottle. And don’t forget to find a good home for your new garden!


Now that you have a beautiful centerpiece, it’ll be that much more fun to style a tablescape around it! I already have a million ideas for this table that I can’t wait to share with you guys! Stay tuned for more posts on this…
I would love to know what you think! Please leave me a comment here or on my Instagram (@styleproductions). And again, I have filmed the entire tutorial on my Instagram stories in the archives, so please feel free to check it out and leave any comments or questions there.
Hope you enjoyed this fun and easy rainy day gardening idea!
xxAlisa


